
Automate publishing documentation using Hugo and GitHub pages
07 Mar 2017 - Giulio Vian - ~4 Minutes
Many of you knows my work on
TFS Aggregator
.
Since the beginning we opted for
Markdown
as the format for the project documentation, at the beginning they were some files in a doc folder, then I moved the content to the project’s GitHub Wiki, today I use the same files to generate the GitHub pages at https://tfsaggregator.github.io/intro/.
In this post I will describe how this latter step works in detail to publish our open source project’s documentation.
Elements
Let’s describe the scenario elements.
The documentation authors updates the content a source repository in GitHub . This content is processed using the delicious Hugo static generator to produce the web site, images, styles and all. The web site is hosted in GitHub Pages ; publication is controlled via the homonymous repository tfsaggregator.github.io .
I decided to use Visual Studio Team Services (VSTS) Build feature to setup Continuous Integration so that any change in the source repository regenerates and republishes the GitHub Pages site.
Hugo documentation has a recipe to publish on GitHub Pages , so the task appeared feasible.
Build Definition
The build process is made of six steps.
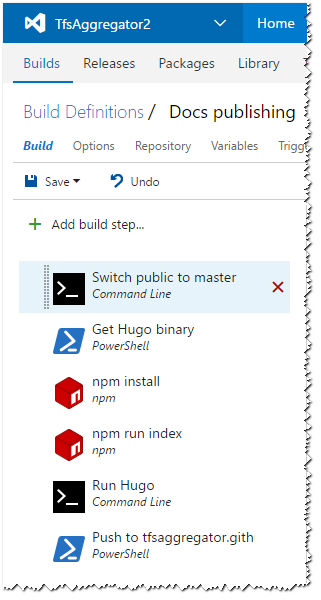
We will examine them one by one soon.
Note
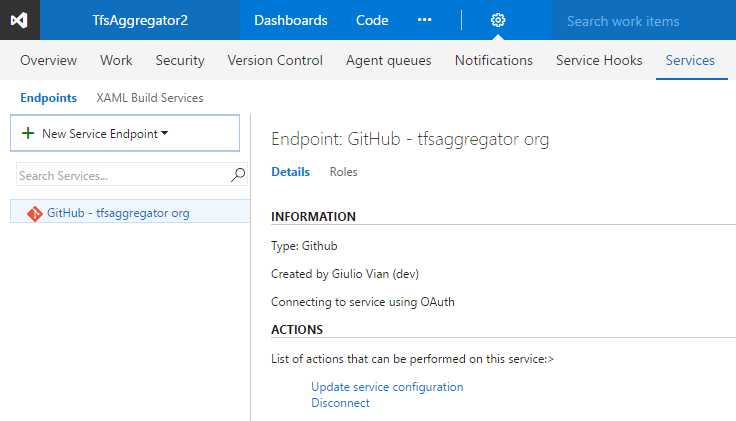
The first requirement is the connection to GitHub, a Service Endpoint in VSTS terms.
The source control definition
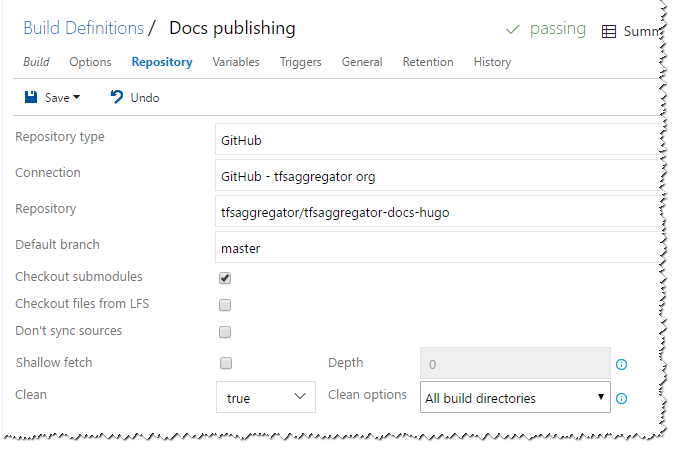
has the Checkout submodules option set.
This is critical because I defined the repository tfsaggregator.github.io as a sub-module of the main tfsaggregator-docs-hugo repository.
Also the Clean option guarantees that there cannot be leftovers if the agent is reused by subsequent builds.
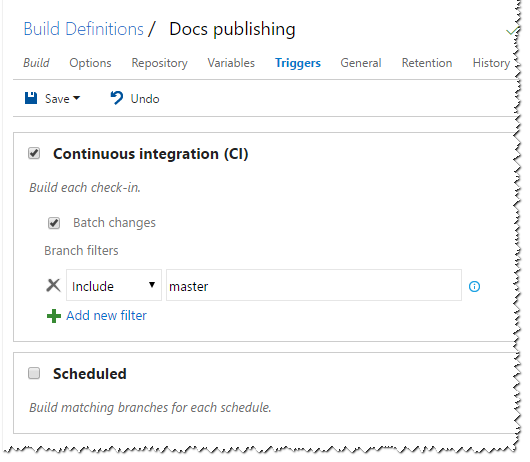
Last notable thing, the build triggers only when the master branch changes. This allows the team to share and locally test changes in an isolated branch.
Build Steps
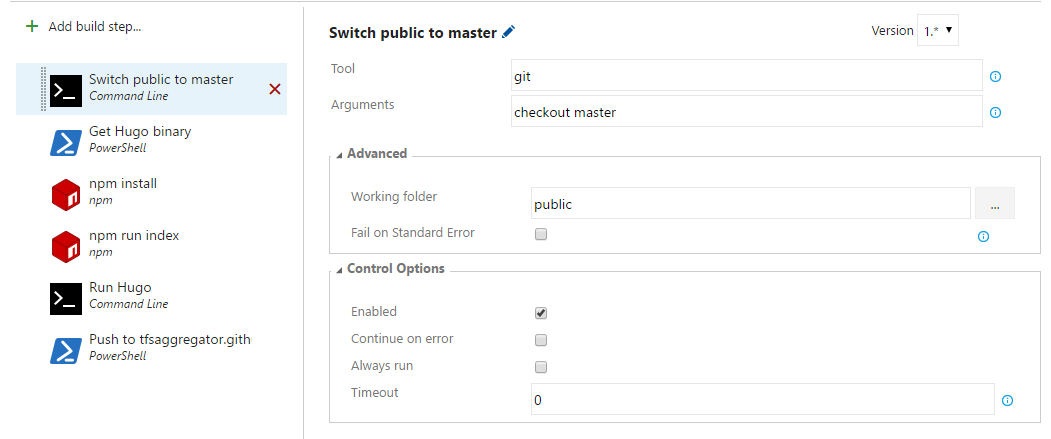
The first step guarantees that the Git sub-module in the public directory, i.e. the tfsaggregator.github.io repository, uses the master branch.
Then the build downloads a fresh copy of the Hugo executable.
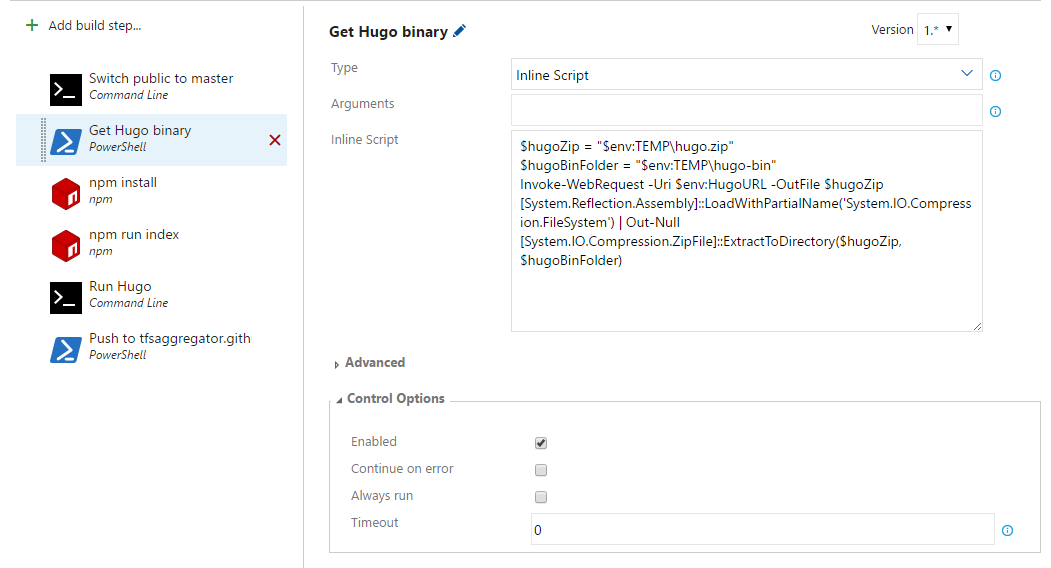
Few lines of Powershell is all we need: Invoke-WebRequest to download the zip file and ZipFile.ExtractToDirectory method to unpack it.
$hugoZip = "$env:TEMP\hugo.zip"
$hugoBinFolder = "$env:TEMP\hugo-bin"
Invoke-WebRequest -Uri $env:HugoURL -OutFile $hugoZip
[System.Reflection.Assembly]::LoadWithPartialName('System.IO.Compression.FileSystem') | Out-Null
[System.IO.Compression.ZipFile]::ExtractToDirectory($hugoZip, $hugoBinFolder)
This is required as Hugo is not installed on the Hosted build agent; in alternative you use a custom agent with pre-installed software. Yet another alternative is to use the technique I described in Mixing TFVC and Git .
Before using Hugo to generate the site, we need another piece, hugo-lunr , to produce the search index file.
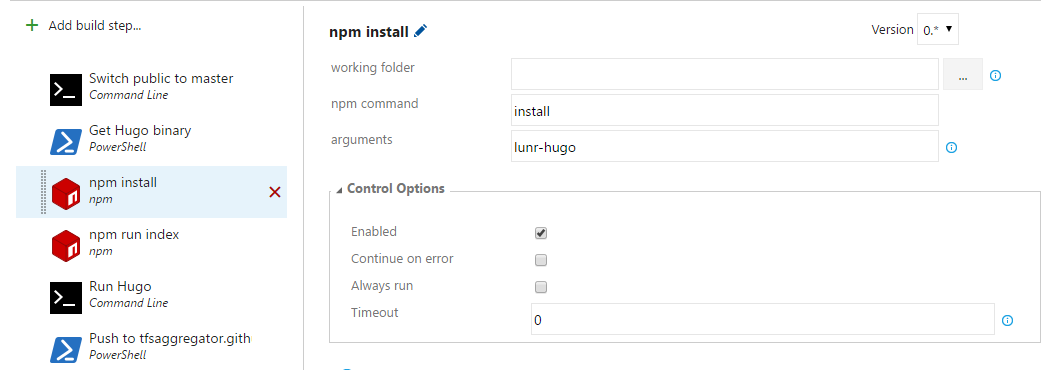
hugo-lunr is a NodeJS tool to
Generate lunr.js index files for Hugo static site search
The search feature in the documentation site requires these index files to lookup words’ positions. NodeJS is pre-installed on VSTS Hosted build agent but hugo-lunr is not. After the NodeJS library is downloaded, the build runs it
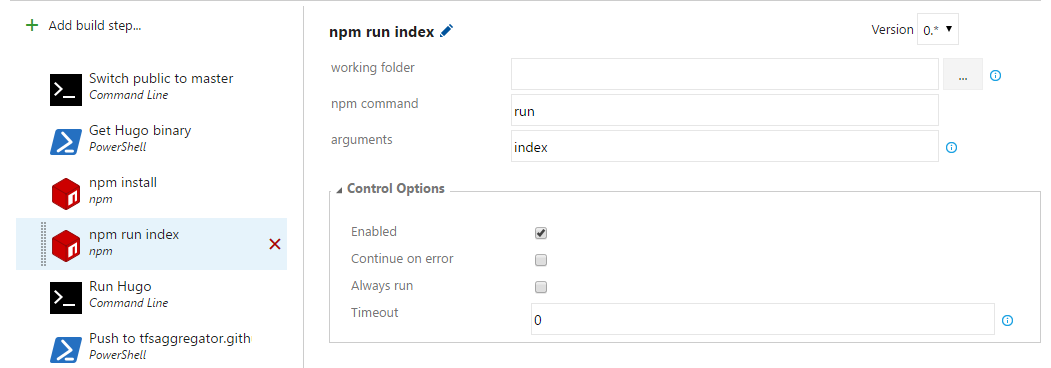
to generate the index.
The step is deceptively simple as it is based on package.json that specify the name of the generated file and the type of files to parse.
{
    "scripts": {
        "index": "lunr-hugo -i \"content/**/*.md\" -o static/json/search.json -l yaml"
    }
}
Finally we get at the core step, site generation using Hugo.
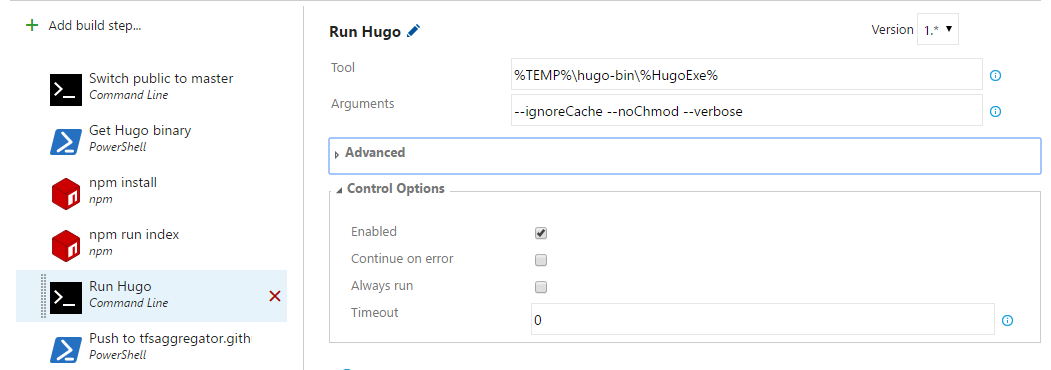
At this point only the local repository has changed, i.e. the clone of tfsaggregator.github.io present in the Hosted agent.
The last step is to push tfsaggregator.github.io changes to GitHub.
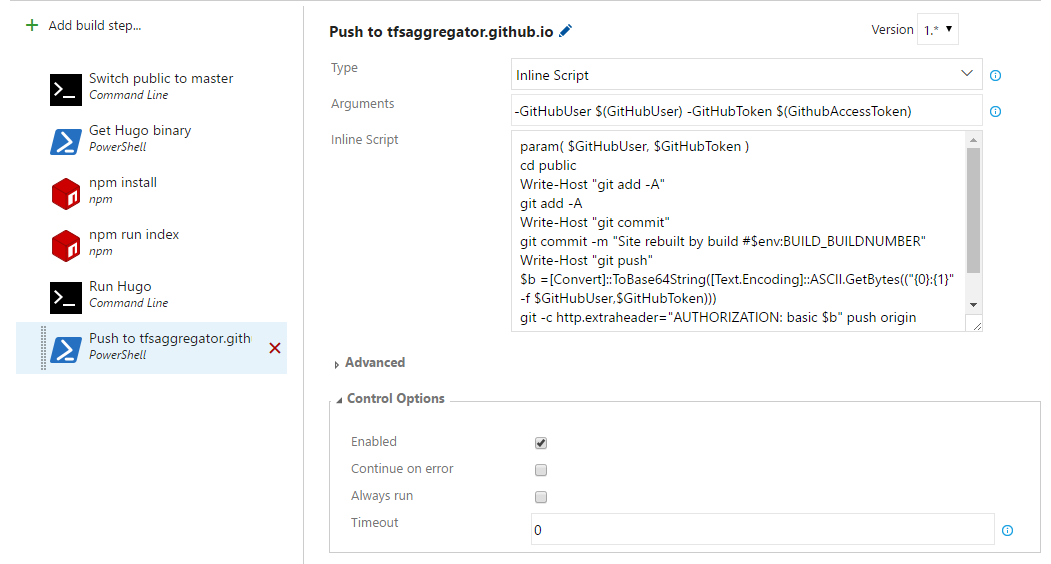
This seems complex, but basically are three git commands: add and commit followed by push.
param( $GitHubUser, $GitHubToken )
cd public
Write-Host "git add -A"
git add -A
Write-Host "git commit"
git commit -m "Site rebuilt by build #$env:BUILD_BUILDNUMBER"
Write-Host "git push"
$b =[Convert]::ToBase64String([Text.Encoding]::ASCII.GetBytes(("{0}:{1}" -f $GitHubUser,$GitHubToken)))
git -c http.extraheader="AUTHORIZATION: basic $b" push origin master
cd ..
There are two interesting items here. The commit message records the build identifier so it will be easier to trace the history.
The second notable thing is the use of http.extraheader to pass authentication data to git.
I asked GitHub for a
Personal Access Token
and saved in the Build Variables.

SYSTEM_ACCESSTOKEN
is of no use here as it allows access to VSTS while we need access to GitHub.
A more elegant solution would be using a custom Build Task that wraps the git push command and access the existing Service Endpoint connection data.
Using Basic Authentication is safe because the GitHub remote uses HTTPS.
Final comments
I am great fan of static web sites: they consume minimal resources, are easily cached, the best performances, no worry for security breaches, and Hugo is the best amongst the tools I tried, recommended.
Hope you found this interesting!